Author: Prodiify320502@user

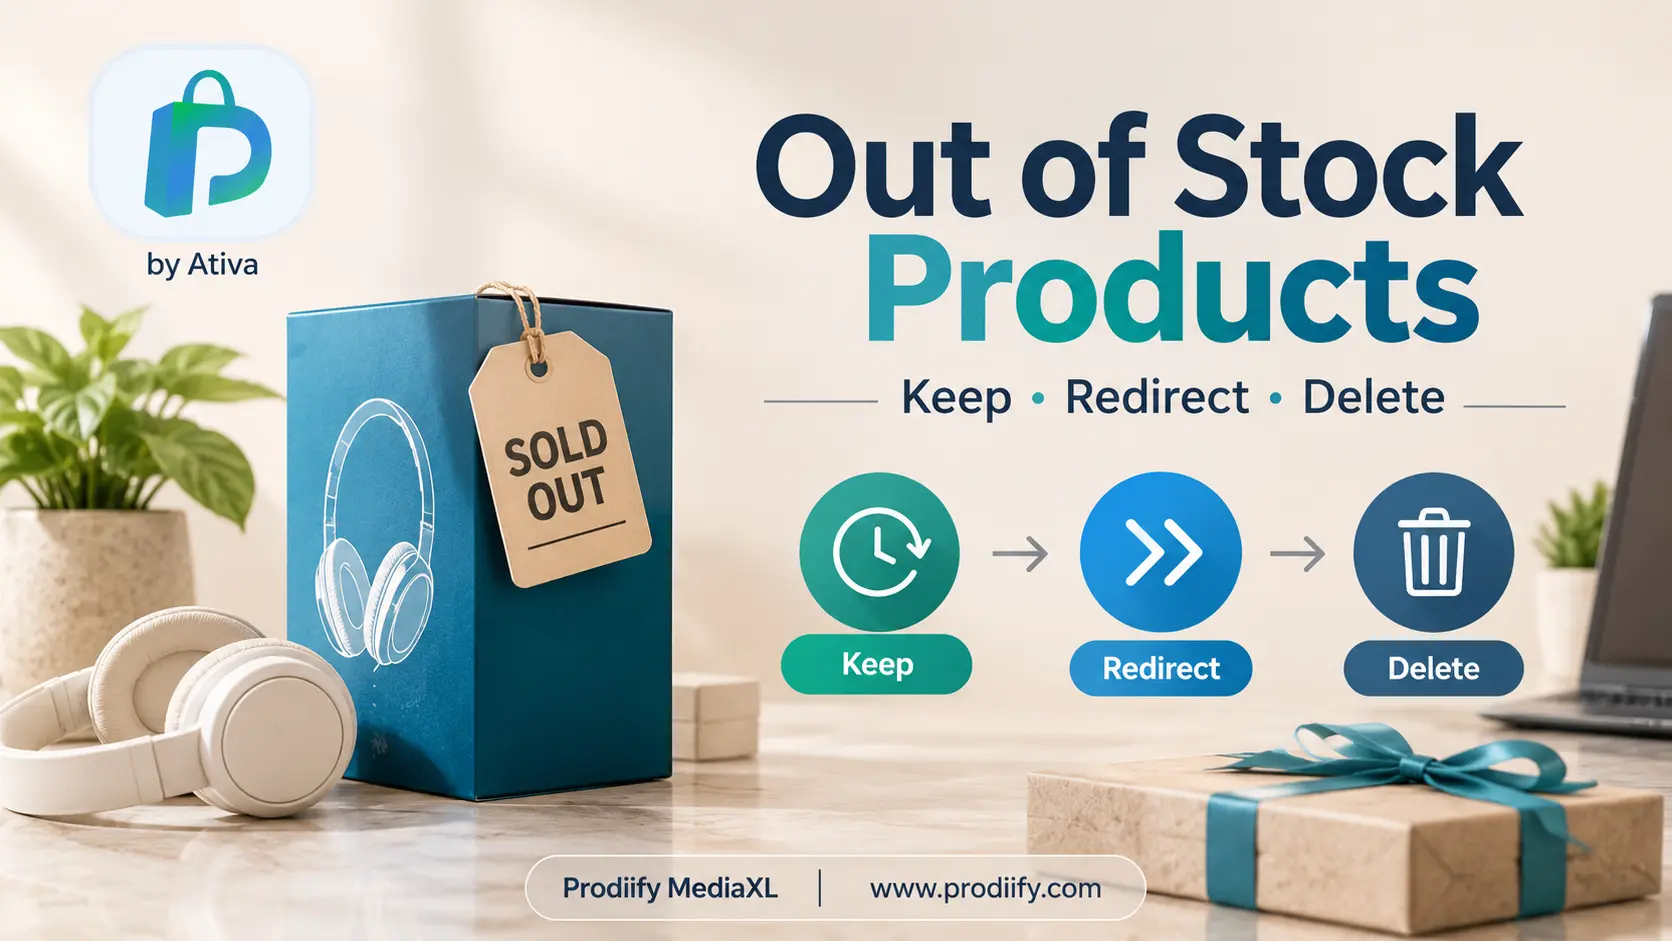
  • What to Do With Out of Stock Products Shopify- Delete, Redirect or Keep?

    What to Do With Out of Stock Products Shopify- Delete, Redirect or Keep?

    What Happens to SEO When Out of Stock Products Shopify Pages Hit Zero Inventory?

    A product sells out, and the first instinct is to hide it or delete it. It feels tidy. But that page may have taken months to rank, collected links, and brought in shoppers who would happily buy something similar.

    The right move depends on one question: is the product coming back, or gone for good? This guide walks through each situation so you do not lose traffic you already earned.

    What Happens to SEO When a Product Goes Out of Stock?

    When inventory hits zero, a Shopify product page stays live by default. The Add to Cart button changes to “Sold out,” and most themes mark the product’s availability as out of stock in the page’s structured data.

    Google can still crawl, index and rank that page. The problems start when you handle it badly:

    • Deleting the page creates a 404 for anyone who had it bookmarked, linked to it or found it in search.
    • Redirecting everything to the homepage confuses shoppers, and Google may treat it as a soft 404.
    • Leaving a dead-end page with no next step sends shoppers straight back to the results page.

    A sold-out page is not a problem by itself. A page with nothing useful to offer is.

    Delete, Redirect or Keep: A Quick Decision Table

    SituationBest action
    Temporarily out of stock, restock expectedKeep the page live and add restock info
    Seasonal product, returns next yearKeep the page, update it when it returns
    Discontinued, but a close replacement exists301 redirect to the replacement product
    Discontinued, has traffic or backlinks, no replacementKeep the page with alternatives, or redirect to the closest collection
    Discontinued, no traffic, no links, no replacementArchive it, or delete it and let it 404
    Product renamed or URL handle changed301 redirect from old URL to new URL

    When to Keep the Page (Temporarily Out of Stock)

    If the product is coming back, keep the page exactly where it is. The URL, reviews, links and rankings all stay in place, so the product picks up where it left off the day it is restocked.

    Make the page useful while it is sold out:

    1. Say when it is coming back. Even “Expected back in early December” builds trust. If you do not know the date, say so honestly.
    2. Add a back-in-stock email option. Many Shopify apps let shoppers sign up to be notified. This turns a lost sale into a future one.
    3. Show related products. Link to similar items so shoppers have somewhere to go.
    4. Keep the description and reviews intact. Do not strip the page down. A full page is what holds the ranking.

    Your enhanced product description and product page design matter even more here, because the page now has to keep shoppers around without a buy button.

    When to 301 Redirect (Permanently Gone, With a Replacement)

    If a product is discontinued and you now sell a close replacement (a newer version, the same item in a new design), use a 301 redirect from the old URL to the new product page.

    A 301 tells Google the page has moved permanently, and it passes most of the old page’s ranking signals to the new one. Shoppers who arrive from search or old links land on something they can actually buy.

    The key rule: redirect to something relevant. A redirect from a discontinued blue running shoe to a similar running shoe is helpful. A redirect from it to your homepage, or to an unrelated product, is not.

    How to set one up in Shopify:

    1. In your admin, go to Online Store → Navigation.
    2. Click View URL Redirects.
    3. Click Create URL redirect.
    4. Enter the old URL path (for example /products/old-product) and the new one.
    5. Save.

    If you are only renaming a product, the Create a URL redirect checkbox appears when you edit the URL handle. Leave it ticked.

    When to Delete or Archive (No Traffic, No Links, No Replacement)

    Some products are genuinely finished: no restock, no replacement, no organic traffic, no backlinks. For these, it is fine to remove the page.

    You have two options:

    • Archive the product. It disappears from your store and the page stops loading, but you keep the product data in your admin in case you need it later.
    • Delete the product. It is gone permanently.

    In both cases the old URL will return a 404. That is acceptable for pages that never mattered. A handful of 404s on low-value pages will not hurt your site. What does hurt is deleting pages that were ranking or had links.

    Before you delete anything, check Google Search Console. Look at the page’s impressions, clicks and links. If it has traffic or links, keep it or redirect it instead.

    The Middle Case: Discontinued, but the Page Still Ranks

    This is the most common mistake. A product is discontinued, but the page still gets visits from Google, and there is no direct replacement.

    Instead of deleting it, turn the page into a helpful landing page:

    • Keep the product information visible.
    • Add a clear note that the product is discontinued.
    • Link to two or three similar products or the closest collection.
    • Keep the page indexed as long as it brings in visitors.

    Shoppers who found you for that product still land somewhere useful, and you may turn them into a sale on something else. When traffic dries up, you can redirect or archive it later.

    Don’t Forget Your Collection Pages

    Sold-out products also show up on collection pages, where they can make a category look empty or stale.

    Shopify lets you push sold-out products to the bottom of automated collections, so in-stock products appear first. This keeps your category pages useful for shoppers without removing the sold-out products from your store. See our guide to Shopify collection page SEO for more on keeping these pages strong.

    Check Your Stock Before Black Friday

    If you are heading into BFCM, now is the time to review your sold-out products. Make sure your best-sellers have a restock note and a back-in-stock option, and that discontinued pages are redirected or updated. Shoppers arriving from ads and search during a sale will not forgive dead ends. Our guide to fixing thin product listings before BFCM covers the rest of the listing checklist.

    Common Mistakes to Avoid

    • Deleting pages without checking Search Console. You may be throwing away traffic.
    • Redirecting every sold-out product to the homepage. This is poor for shoppers and weak for SEO.
    • Redirecting to an unrelated product. If the replacement is not a real match, a 404 is better.
    • Leaving a stripped-down page. Keep the description, images and reviews while a product is sold out.
    • Creating redirect chains. If A redirects to B and B later redirects to C, update A to go straight to C.
    • Ignoring your 404 report. Review it regularly. Our Shopify technical SEO checklist shows how to catch broken pages early.

    Keep the Replacement Page Strong

    A redirect only helps if the page it points to is worth landing on. If you are sending traffic from an old product to a new one, check that the new page has a clear title, a complete description and a good meta description. Prodiify helps you improve titles, descriptions and meta content for each product with AI suggestions you review and approve, so the page that inherits the traffic is ready for it.

    FAQs About Out of Stock Products Shopify and SEO

    1. Do out-of-stock products hurt SEO on Shopify?

    Not by themselves. A sold-out page can keep ranking as long as it stays live and useful. Problems come from deleting ranking pages, redirecting them badly, or leaving them with no information.

    2. Should I delete out-of-stock products in Shopify?

    Only if the product is gone for good and the page has no traffic, no backlinks and no replacement. If the product is coming back, keep it. If it has a replacement, use a 301 redirect.

    3. Should I redirect a sold-out product to the homepage?

    No. Redirect to the closest relevant product or collection. A homepage redirect is a poor experience for shoppers, and Google may treat it as a soft 404.

    4. What is the difference between archiving and deleting a Shopify product?

    Archiving hides the product and its page but keeps the data in your admin, so you can restore it later. Deleting removes it permanently. In both cases the old URL stops loading unless you add a redirect.

    5. How do I set up a 301 redirect in Shopify?

    Go to Online Store → Navigation → View URL Redirects, and create a redirect from the old URL path to the new one.

    6. How long should I keep a discontinued product page?

    Keep it for as long as it gets traffic or links. Once visits drop to almost nothing, redirect it to a relevant page or archive it.

    Final Thoughts: What to Do With Out of Stock Products Shopify Pages

    Out-of-stock does not mean out of luck. Keep pages that will return, redirect pages that have a true replacement, and only delete pages that have nothing left to give. Check Search Console before you remove anything, and always send shoppers somewhere useful.

    Try Prodiify free on the Shopify App Store and keep your product pages ready for whatever comes next.


  • Shopify SEO for Fashion Accessories- 7 Steps to Rank

    Shopify SEO for Fashion Accessories- 7 Steps to Rank

    Shopify SEO for Fashion Accessories

    Selling bags, jewelry, watches, scarves or sunglasses on Shopify is a visual business. Shoppers decide with their eyes first, and they usually search the same way: by looking at pictures. That changes how you should approach SEO.

    Most Shopify SEO advice is written for general stores or for clothing brands. Accessories have their own problems: tiny differences between products (finish, hardware, stone, strap length), colour variants everywhere, seasonal drops, and buyers who search for a look, not a model number. This guide covers the accessories-specific version of Shopify SEO, step by step.

    If you want the general foundation first, start with our Shopify SEO checklist and our Shopify SEO tips. This post builds on them.

    Why accessories SEO is different

    Three things make accessories stores harder to optimize than a typical catalog.

    1. Image search matters more. One fashion SEO agency estimates that image search makes up roughly 20 to 30 percent of fashion-related query volume, and more in visual categories like accessories. Treat that as an agency estimate, not a guarantee, but the direction is clear: your photos are a ranking surface, not just decoration.

    2. Products look alike to Google. Ten leather crossbody bags can have almost identical titles and descriptions. If your page text does not separate them, search engines cannot either.

    3. Catalogs churn. Fashion collections often turn over every few months. If your URLs and collection structure are built around seasons, you throw away the ranking history every time a season ends.

    The stakes are real. Shopify’s own benchmarks put the average conversion rate for fashion clothing and accessories at around 1.63 percent, so every visitor you earn from search is worth getting right.

    Step 1: Write product titles that describe the piece

    A title like “Gold Earrings” tells Google almost nothing. A better title carries what a buyer would actually type: material, type, style and sometimes occasion.

    A simple formula:

    Material or finish + Product type + Style or detail + Occasion or audience (optional) + Brand

    Weak titleStronger title
    Gold EarringsGold Plated Jhumka Earrings for Weddings, YourBrand
    Black BagBlack Leather Crossbody Bag with Gold Hardware
    Silver Ring 14Sterling Silver Stackable Ring with Moonstone
    SunglassesRound Tortoiseshell Polarized Sunglasses for Women

    Keep titles readable. Do not stuff every keyword in. If the title would sound strange read aloud, cut it back. Put the most important words first, because long titles get truncated in search results.

    Step 2: Fix your image alt text

    Alt text is the text description attached to an image. It helps shoppers using screen readers, and it helps search engines understand what the picture shows. For accessories, it is one of the highest-impact fixes because so many stores leave it empty or leave a raw file name.

    Good alt text names what is actually visible:

    • Bag: “Women’s black leather crossbody bag with gold hardware”
    • Necklace: “14k gold pendant necklace with small diamond”
    • Watch: “Men’s brown leather strap watch with white dial”
    • Scarf: “Red silk printed scarf folded on a wooden table”

    A few rules that work well:

    1. Describe the image honestly, not what you wish it said.
    2. Mention material, colour and type where they are visible.
    3. Vary the alt text across a product’s gallery: front view, detail shot, on-model shot, packaging.
    4. Skip “image of” or “picture of”. Screen readers already announce it.
    5. Rename image files before upload too. “black-leather-crossbody-bag.jpg” beats “IMG_4821.jpg”.

    You can set alt text in Shopify admin: open the product, click the image, then choose Edit alt text.

    Step 3: Handle colour and finish variants carefully

    Accessories often come in many colours, metals and sizes. On Shopify, variants of one product normally share one product page, which is usually what you want. The risk shows up in two places:

    • Too many separate products for the same item. If you list the same bag as five different products just for colour, you split ranking signals and create near-duplicate pages.
    • Thin pages for genuinely different designs. If a design really is different, give it its own product page with its own unique title and description.

    A good rule: same design, different colour or size means one product with variants. Different design means a separate product. Make sure each variant has its own correctly labelled image, so image search can match the colour people are looking for.

    Step 4: Write descriptions that separate similar products

    Unique descriptions are how you stop similar products from blending together. For accessories, a strong description combines a short story with hard facts.

    Include:

    • Material and finish: full-grain leather, 18k gold plating, stainless steel, acetate frames
    • Dimensions and fit: strap drop, chain length, ring size range, lens width
    • Details that matter: hardware colour, closure type, number of pockets, water resistance
    • Care and durability: how to clean it, whether plating can tarnish
    • Use case: office, wedding, gifting, travel

    Put the key facts in scannable bullets and keep the story to a couple of sentences. For more on this, see our guides on AI product description generators for Shopify and ChatGPT prompts for Shopify product descriptions.

    Do not copy supplier text. If other stores use the same manufacturer description, search engines see duplicate content and have no reason to prefer yours.

    Step 5: Build collections that last longer than a season

    Collection pages are where shoppers browse, and where many accessories stores win or lose organic traffic. Shoppers search categories like “crossbody bags”, “gold hoop earrings” or “minimalist watches”, not your internal collection names.

    Build evergreen collections. Create stable pages such as /collections/crossbody-bags, /collections/hoop-earrings and /collections/leather-belts. Keep them live all year and rotate the products inside.

    Handle seasonal drops separately. If you run campaign collections like “Summer Edit”, treat them as temporary pages. When a season ends, redirect the old page to the closest evergreen collection instead of deleting it, so you do not leave dead links behind.

    Write real collection copy. Add a short intro of around 100 to 200 words above or below the products, covering what the category includes, who it is for, and how to choose. Link to your best sellers and related collections.

    Keep navigation logical. A clear structure like Bags > Crossbody Bags helps both shoppers and search engines understand how your catalog fits together.

    Our technical SEO checklist for Shopify covers redirects, crawling and indexing in more depth.

    Step 6: Make your pages fast and your photos persuasive

    Accessories pages are image-heavy, and heavy images slow pages down. Slow pages hurt both rankings and sales.

    • Compress product images before upload, without losing the detail shots that sell premium pieces.
    • Use modern image formats where your theme supports them.
    • Lazy-load images below the fold.
    • Remove apps you no longer use, since each one can add scripts.

    On the conversion side, a strong product page does as much work as the SEO that brought visitors to it. Our guide to Shopify product page design shows how to lay out images, details and trust signals, and our post on A+ content on Shopify explains how richer layouts can help shoppers compare accessories with confidence.

    Step 7: Get ready for AI shopping search

    Shoppers increasingly ask AI assistants questions like “best gold hoop earrings under 50 dollars”. Those tools lean on clear, specific product information: exact materials, sizes, use cases and consistent titles. The same details that help classic SEO also help AI search understand your catalog. See our guide on how to get your Shopify products recommended by ChatGPT for the full picture.

    Where Prodiify fits in

    Doing all of this by hand is slow, especially when each piece needs its own title, description, tags and alt text. Prodiify is a Shopify app that helps you improve product titles, descriptions, tags and image alt text with AI, working product by product so you can review and shape each result before it goes live. It also helps with AI-search visibility, and its MediaXL builder lets you create richer A+ style content for your product pages.

    You can install Prodiify from the Shopify App Store.

    Accessories SEO checklist

    • Product titles include material, type and style
    • Every image has descriptive alt text and a clean file name
    • Same-design colour options are variants, not separate products
    • Descriptions are unique, with specs in bullets
    • Evergreen collection URLs exist for every core category
    • Seasonal collections are redirected when they expire
    • Collection pages have real intro copy
    • Images are compressed and pages load fast
    • Product details are specific enough for AI search to understand

    FAQs-About Shopify SEO for Fashion Accessories

    1.Is SEO for fashion accessories different from clothing SEO?

    The basics are the same, but accessories lean harder on image search, material and finish details, and distinct product titles, because many items look similar.

    2.How long should alt text be?

    As long as it takes to describe the image clearly, usually one short sentence. Avoid stuffing keywords.

    3.Should I create a separate product for each colour?

    Only if the design is genuinely different. For the same design in different colours, use variants on one product page.

    4.What should I fix first?

    Start with your best sellers: improve the title, alt text and description on those pages first, then move on to collections.

    Final thoughts on Shopify SEO for Fashion Accessories

    Accessories SEO comes down to being specific. Specific titles, specific alt text, specific descriptions and stable collection pages give search engines and shoppers exactly what they are looking for. Start with your top ten products, fix them properly, and build from there.

  • Ecommerce SEO for Shopify Websites: What Actually Gets You Traffic

    Ecommerce SEO for Shopify Websites: What Actually Gets You Traffic

    Ecommerce SEO for Shopify Websites

    Search “Shopify SEO” and you’ll find lists with forty tips. Almost nobody tells you that maybe six of them decide whether your store shows up. The rest is noise that keeps you busy while your traffic stays flat.

    So here’s the short version: what matters, in the order I’d do it.

    Start with what you sell, in the customer’s words

    Your product might be a “lumbar support ergonomic cushion”. Your customer types “cushion for lower back pain in office chair”. Those are different searches, and the second one is the one that brings a sale.

    Spend time reading how buyers describe their problem: reviews on Amazon, Reddit threads, the questions at the bottom of Google results. Then use those exact phrases in your titles and descriptions. This single habit does more for ecommerce SEO than any plugin.

    Google doesn’t know you exist yet

    Think of Google as a very busy librarian. Your store is a new book that nobody has told her about. Until she understands what’s inside and sees that other people care about it, you stay on a back shelf.

    So the whole job is two things: explain clearly what you sell, and give her reasons to trust you. Everything else is detail.

    Find the words people actually type

    Before touching a single setting, spend an hour on keyword research. Open Google Keyword Planner, type your product, and look at what comes back. Then do the free thing most people skip: search your product on Google and scroll to “People also ask” and the suggestions at the bottom.

    You’ll notice something quickly. “Running shoes” is brutal, with huge brands owning it. But “running shoes for flat feet” or “lightweight running shoes for daily use” is where a small store can actually win. Fewer people search it, but the ones who do are close to buying.

    Your collection pages are your real money pages

    Here’s where most beginners go wrong. They polish product pages and ignore collections. But when someone types “leather wallets for men”, Google wants to show a category, not one random wallet.

    Give each collection one main keyword. Write two or three honest sentences at the top about who the collection is for. In the Shopify admin, scroll to the search engine listing and fix the page title and description, because the default one is usually just the collection name, which tells Google almost nothing.

    Small Shopify things that quietly hurt you

    Shopify does the heavy lifting on basics, but a few things still trip people up.

    Duplicate content is the big one. The same product can open under both a collection URL and its main URL. Shopify’s canonical tags handle most of it, but make sure your menus and links point to the main product link.

    If you ever change a product handle, add a 301 redirect, otherwise the old link dies and takes its ranking with it. And if you copied the supplier’s description word for word, rewrite it. Fifty other stores have the same paragraph, and Google isn’t going to pick yours.

    Also add your sitemap (yourstore.com/sitemap.xml) to Google Search Console. It takes two minutes and tells Google where everything is.

    Speed is part of SEO, not a separate topic

    People leave slow stores. Google notices that. Compress your images before uploading, delete apps you stopped using months ago (their code often stays behind), and check your mobile score on PageSpeed Insights. Don’t chase a perfect 100. Just fix whatever the report marks in red.

    Write things your products can’t say

    A product page can only talk about the product. A blog can answer the questions people ask before they’re ready to buy. If you sell skincare, “how to build a skincare routine for oily skin” will bring in readers who’ve never heard of you. Link that post to your cleanser collection and you’ve built a path from curiosity to cart.

    Let other people vouch for you

    Backlinks sound technical, but they’re basically recommendations. Real reviews on your pages, a mention in a niche blog, a listing in a good directory: each one tells Google you’re a real business. Start small and local to your niche before chasing big names.

    Check in once a month

    Connect Google Search Console and look at it monthly. Find pages that get plenty of impressions but few clicks. Those pages already rank, and people just aren’t tempted by the title. Rewrite it, wait two weeks, and look again. This is the cheapest improvement in all of Shopify SEO.

    FAQs About Ecommerce SEO for Shopify Websites

    1.What is ecommerce SEO for Shopify websites?

    Ecommerce SEO for Shopify websites means making your store easy for Google to understand and worth showing to shoppers. It covers product titles, collection pages, site speed and internal links, all working together so more people find your store without paid ads.

    2.Is Shopify good for SEO?

    Yes. Shopify handles technical basics like SSL, a sitemap and canonical tags. But ecommerce SEO for Shopify websites still depends on what you add: the right keywords, helpful content and a store people trust.

    3.How long does Shopify SEO take to show results?

    Most stores see movement in three to six months. In a competitive niche, ecommerce SEO for a Shopify website can take longer, so steady work beats quick tricks.

    4.Do collection pages matter for Shopify SEO?

    A lot. Shoppers often search for a category like “oversized hoodies” before a single product. Good collection page SEO means one main keyword, a short useful intro and links to related collections.

    5.How do I optimize Shopify product pages for SEO?

    Use a descriptive product title that matches how customers search, write a unique description instead of the supplier’s copy, add image alt text and link to related products. Product page SEO is one of the fastest wins in any Shopify SEO strategy.

    6.Can I do Shopify SEO without apps?

    Yes. The built-in fields handle page titles, meta descriptions, alt text and redirects. For ecommerce SEO on a Shopify website, an app only helps later when you need bulk edits across hundreds of products.

    7.Does page speed affect Shopify store SEO?

    It does. Slow stores lose visitors, and Google notices. Compress images, remove unused apps and check your mobile score on PageSpeed Insights to keep your Shopify website fast.

    8.How do I know if my ecommerce SEO is working?

    Connect Google Search Console and track impressions, clicks and indexed pages. If a page gets many impressions but few clicks, rewrite its title and meta description to make it more tempting.

    9.What is the biggest mistake in Shopify website SEO?

    Copying manufacturer descriptions and ignoring collection pages. Both leave Google with nothing unique to rank, which is why many stores stay invisible even after months of effort.

    10.Do I need an SEO app?

    Not on day one. Add one later if you have hundreds of products to edit.

  • Product Reviews SEO: How to Get Your Reviews to Rank on Google

    Product Reviews SEO: How to Get Your Reviews to Rank on Google

    A simple 10-step guide to ranking your product reviews SEO, earning reader trust, and turning visitors into buyers.

    You spent three weeks testing a pair of headphones. You wrote 2,000 words. You hit publish.

    And then… nothing. No traffic, no clicks, no sales.

    Meanwhile, a generic page that copied the product specs from Amazon is sitting on page one.

    Frustrating, right? The good news is that this is fixable. Product reviews SEO is not about tricks. It is about showing Google, and your readers, that your review is the one they can trust. Here is exactly how to do it.

    Why Product Reviews Are Worth the Effort

    Someone searching “best budget laptop” or “Sony WH-1000XM5 review” is not browsing for fun. They are about to spend money. That makes review traffic some of the most valuable traffic online.

    It also means competition is tough. Google has made it clear that it wants reviews showing real experience, not rewritten product descriptions. If your review feels like it was written by someone who never touched the product, it will struggle.

    Step 1: Match What the Searcher Wants

    Before writing, ask: what is this person trying to do? Most review searches fall into four types:

    Search typeExamplePage you should write
    Single review“Dyson V15 review”One in-depth product review
    Comparison“AirPods Pro vs Galaxy Buds”Head-to-head comparison
    Best list“best vacuum for pet hair”Ranked roundup
    Alternatives“Dyson V15 alternatives”List of similar products

    Rule: one page, one intent. A page that tries to be a review, a comparison, and a buying guide at once usually ranks for none.

    Pro tip: If your site is new, go after specific phrases like “best laptop for college students under $600.” They have less competition and the readers are more ready to buy.

    Step 2: Prove You Really Used It

    This is the biggest ranking and trust factor. Compare these two lines:

    • ❌ “The battery life is excellent.”
    • ✅ “I used it daily for 11 days of commuting and charged it only twice.”

    The second one is believable, specific, and impossible to copy from a spec sheet. To build that trust:

    • Take your own photos and videos. Skip the manufacturer’s images.
    • Share real numbers and moments. Battery hours, noise levels, what annoyed you on day three.
    • Mention how long you tested. “After 3 months” carries weight.
    • Include honest cons. A review with zero downsides reads like an ad.
    • Add a short “How we test” box. Readers and search engines both like transparency.

    Step 3: Build a Review That People Can Skim

    Most visitors scan before they read. Give them what they need fast:

    1. Verdict at the top. Who it is for, a rating, and a one-line summary.
    2. Quick specs table.
    3. Pros and cons.
    4. Detailed sections on design, performance, and value.
    5. Who should buy it and who should skip it.
    6. Alternatives.
    7. FAQ with real questions people ask.

    Start each section with a direct, short answer. That is how you get picked for featured snippets, the box at the top of Google results.

    Step 4: Write Titles People Want to Click

    Your title does two jobs: include the keyword and give a reason to click.

    • ❌ “Sony WH-1000XM5 Review”
    • ✅ “Sony WH-1000XM5 Review: 3 Months Later, Worth It?”

    Keep it under 60 characters. For your meta description, tell readers what they will learn in about 150 characters. A higher click rate tells Google your page is a good result.

    Step 5: Add Review Schema for Star Ratings

    Schema markup is a bit of code that tells Google “this is a review, and here is the rating.” It can make your result show star ratings, which stand out in search.

    • Use Product and Review schema
    • Include the product name, author, and rating
    • Test it with Google’s Rich Results Test
    • Only mark up genuine reviews. Never fake ratings

    If you use WordPress, plugins like Rank Math or Yoast can add this for you.

    Step 6: Connect Your Content (Topic Clusters)

    Don’t publish random reviews. Build groups of related pages:

    • Main page: “Best Noise-Cancelling Headphones”
    • Supporting pages: individual reviews, comparisons, buying tips

    Link them to each other using clear anchor text like “our Sony XM5 review.” This shows Google you are an expert on the topic and keeps readers clicking through your site.

    Step 7: Be Open About Affiliate Links

    If you earn commissions:

    • Disclose it near the top of the page
    • Add rel="sponsored" to affiliate links
    • Never rank products by commission. Readers notice, and they stop coming back

    Trust is your real ranking asset. One honest recommendation is worth more than ten pushy ones.

    Step 8: Keep Reviews Fresh

    A review from 2022 about a product that has had three updates helps no one.

    • Show a clear “Last updated” date
    • Re-check top pages every few months
    • Say what changed, not just the date
    • Link to the newer model’s review when it launches

    Updating old posts is often the fastest way to gain rankings, because the page already has history.

    Step 9: Fix the Technical Basics

    Great content on a slow site loses. Check these:

    • Fast loading: compress images, use WebP format
    • Mobile-friendly: most review readers are on phones
    • Image alt text: short descriptions like “Sony XM5 headphones on a desk”
    • Clean URLs: /sony-xm5-review/, not /post?id=4827

    Step 10: Earn Backlinks

    When other sites link to you, Google sees a vote of trust. Original test data, unique photos, and honest findings make people want to link to you. You can also share your results with bloggers and journalists, and answer questions in communities where your review genuinely helps.

    6 Mistakes That Kill Review Rankings

    1. Copying the manufacturer’s description
    2. Reviewing products you never used
    3. Hiding the negatives
    4. Publishing “best of” lists with no selection criteria
    5. Ranking by commission instead of quality
    6. Never updating old posts

    Quick Checklist Before You Publish

    • ☐ One clear search intent
    • ☐ Keyword in title, URL, and first paragraph
    • ☐ Original photos and real testing details
    • ☐ Pros and cons included
    • ☐ Verdict at the top
    • ☐ Affiliate disclosure added
    • ☐ Schema markup tested
    • ☐ Page loads fast on mobile
    • ☐ “Last updated” date visible

    Product Reviews SEO FAQs

    1.How long does it take for a review to rank?

    New sites often need 3 to 6 months. Established sites can see movement in weeks. Updating and improving a page speeds things up.

    2.Do I need to buy every product I review?

    Not always, but you must have used it. If you could not test something, say so clearly.

    3.How long should a product review be?

    As long as it needs to be to answer the reader’s questions. Most strong reviews run 1,500 to 2,500 words, but quality beats length.

    4.Does affiliate linking hurt SEO?

    No, if you disclose it and mark links correctly. Problems start when content exists only to push links.

    Product Reviews SEO: Final Thoughts and Your Next Step

    Product reviews SEO is simple at its core: be the most honest and useful result for someone about to buy. Test properly, show proof, structure it for easy reading, and keep it updated.

    Pick one product you already know well, apply this checklist, and publish. Then do it again. Rankings come from consistency.

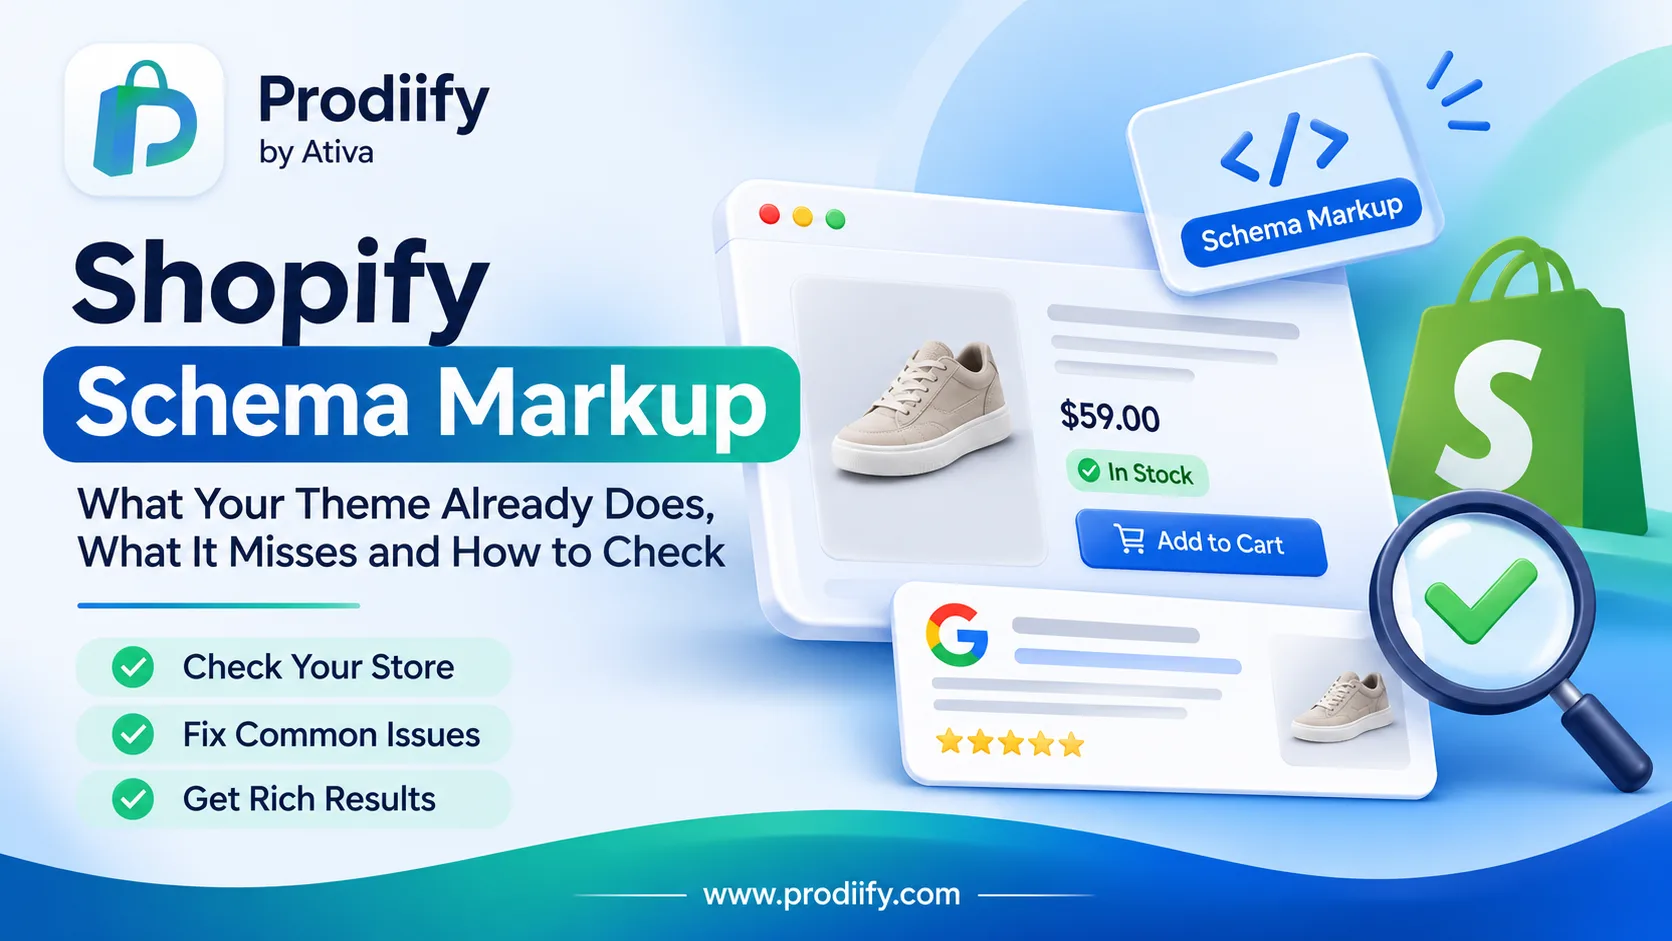
  • Shopify Schema Markup: What Your Theme Already Does, What It Misses and How to Check

    Shopify Schema Markup: What Your Theme Already Does, What It Misses and How to Check

    Shopify schema markup is less about writing code and more about knowing what your store already says to Google, and whether it says it correctly.


    Here is something that surprises many store owners: you probably already have schema markup. Dawn and most Shopify-supported themes output a Product JSON-LD block automatically, and one agency guide says it includes name, description, image, and a basic Offer object.

    So the useful question is rarely “how do I add schema?” It is “what is my store already outputting, is it correct, and is anything else interfering?” This guide walks you through checking that, then explains what to do with what you find. Schema markup will not rank a weak page, but it helps search engines read your product data accurately, and that is worth getting right.

    First, a Plain-English Definition

    Schema markup (also called structured data) is a block of code on your page, usually in a format called JSON-LD, that labels information for machines. Your page shows a shopper “$59, in stock”. The markup tells Google the same thing in a format it can read without guessing: this is a product, this is its price, this is the currency, this is its availability.

    On Shopify there is a built-in helper for this. Liquid has a native structured_data filter, {{ product | structured_data }}, that converts a product object into schema.org JSON-LD automatically, as Product if it has no variants, or ProductGroup if it has one or more. That is why many themes already do the basics for you.

    Check What Your Store Outputs (Three Minutes)

    Before changing anything, look.

    1. Open Google’s Rich Results Test.
    2. Paste the URL of one of your product pages and run the test.
    3. Read the result: which types were detected (Product, Merchant listing), and are there errors or warnings?

    A second option is the Schema.org validator, which one guide says catches structural errors the Rich Results Test sometimes misses. Use both if you are unsure.

    What you see will usually fall into one of four situations.

    Situation 1: One Product Block, No Errors

    Good news. Your theme is doing its job. You can stop here, or improve it with the extra fields in “Fields Worth Adding” below. If you want a broader technical review of the rest of your store, our Shopify technical SEO checklist covers the other items worth checking.

    Situation 2: Two Product Blocks (Duplicate Schema)

    This is the most common problem, and it is easy to miss because the page looks normal. The Rich Results Test shows two Product entries instead of one.

    Shopify merchants run into it regularly. In one Shopify Community thread, a merchant reports that the Rich Results Test shows two Product JSON-LD entries, with the duplicate coming from the theme. In another, a store using the Dawn theme with the Shopify Product Reviews app found that the app created a duplicate set of rich data fields for each product, so the test detected two Products.

    Why it matters: an agency guide explains that apps add a dependency: if the app’s output conflicts with your theme’s native schema, you get duplicate JSON-LD blocks, and duplicate blocks with conflicting data are treated as an error.

    What to do:

    • Work out where each block comes from. A community reply suggests the theme-generated block is likely near the opening body tag in theme.liquid with product-only conditions, or inside the product template or snippet such as main-product.liquid in Dawn-based themes.
    • Keep one source. Either rely on your theme’s schema and switch off the app’s, or switch the theme’s off and let the app handle it. Do not run two schema apps at once.
    • Back up your theme before editing code, and ask a developer if you are not comfortable with Liquid.
    • Re-run the test to confirm that only one Product remains.

    Situation 3: Product Detected, but Nothing Eligible

    This one is subtle. A valid Product block is not the same as a rich-result-eligible one. According to Google’s product snippet documentation as summarized by a schema guide, a Product needs a name, plus at least one of three properties: offers, review or aggregate Rating. The same guide warns that a block carrying only a name is valid but ineligible for any rich result, because Google has nothing to display.

    For merchant listings, which can show price, availability and shipping details, the hard requirements are name, image, and a nested offers with a price and currency. Adding the merchant-listing fields also covers product snippets, so shops should aim at that fuller standard.

    What to do: check in the test results whether offers, price, priceCurrency and image are present. If your theme leaves gaps, a developer or a schema app can fill them in. Choose one and avoid overlap, as in Situation 2.

    Situation 4: Errors on Products With Variants

    If you sell sizes and colors, structured data has to describe several offers rather than one. Shopify’s structured_data filter handles this with a ProductGroup type for products that have variants, but themes and apps differ in how well they do it, so test a variant-heavy product specifically. If you are still deciding how to structure options in the first place, our guide to Shopify product variants SEO explains the trade-offs.

    A Small Example of Product Schema

    Here is what a minimal, merchant-listing-style block looks like. This is an illustration, not something to paste in blindly: your theme or app likely generates this for you, and the values must match your real page.

    json

    {
      "@context": "https://schema.org/",
      "@type": "Product",
      "name": "Slim Handmade Leather Wallet",
      "image": ["https://example.com/images/wallet.jpg"],
      "description": "Slim brown leather wallet that holds eight cards.",
      "sku": "WAL-001",
      "brand": { "@type": "Brand", "name": "Example Leather Co." },
      "offers": {
        "@type": "Offer",
        "url": "https://example.com/products/slim-leather-wallet",
        "priceCurrency": "USD",
        "price": "59.00",
        "availability": "https://schema.org/InStock"
      }
    }

    Notice the availability value. Schema guides point out that string values like “in stock” are not valid; it has to be the full URL https://schema.org/InStock. Small details like this are where hand-written schema usually breaks.

    Reading What You Found: What the Markup Cannot Do

    It is worth being clear about the limits of Shopify schema markup:

    • It does not rank a page. It helps Google read your data and makes the page eligible for rich results. It does not guarantee them.
    • It must match the page. Schema that disagrees with what visitors see is a risk, not a shortcut. One guide describes JSON-LD that drifts from the rendered page as the textbook case Google’s spam policies flag as misleading structured data. If you change a price or title, the markup has to follow, which is another reason to let the theme generate it from live product data. anglera
    • It only reads what you wrote. Schema repeats the information on your page. A vague title or thin description makes vague schema. See Shopify product title SEO for writing the part that schema reads.
    • It belongs on single product pages. Guides note that merchant listings are restricted to single-product pages, so do not mark up category or collection pages as Product. For those, see Shopify collection page SEO.

    Fields Worth Adding Beyond the Minimum

    Once the basics are right, a few extra properties make the data more informative:

    • brand and sku help identify the exact product.
    • gtin or mpn, where you have them, help match your product to others.
    • aggregateRating and review, only if you collect real reviews on the page.
    • Shipping details and return policy. Guides note these are recommended, not required, but answer the questions a shopping agent is likely to ask on a buyer’s behalf. anglera
    • More images. One schema guide calls the image the first extra field to add.

    Why This Matters More as AI Shopping Grows

    Structured data gives machines a clean, labeled version of your product, which is useful for search engines and increasingly for AI shopping tools. No one can promise recommendations, but accurate, consistent data gives you the best chance of being understood. We cover the bigger picture in Shopify agentic commerce. Prodiify does not add schema, but it helps with the content schema reads, writing clear titles and descriptions one product at a time.

    FAQs- About Shopify schema markup

    1.Do I need a schema app for Shopify?

    Not necessarily. If your theme already outputs complete product schema, an app may only create duplicates. Apps can help when your theme leaves gaps, but use one source at a time.

    2.Does Shopify add schema markup automatically?

    Yes, in most cases. Default themes like Dawn output basic Product JSON-LD with name, image, description and a simple offer. Quality varies by theme and version, so test your own pages.

    3.How do I test my Shopify schema markup?

    Paste a product URL into Google’s Rich Results Test and check which types are detected and whether there are errors. You can also use the Schema.org validator.

    4.What is duplicate schema, and why is it a problem?

    It means two Product blocks appear on the same page, often from a theme and an app. Duplicates with conflicting data can trigger errors, so keep one source.

    5.Will schema markup get me rich results?

    It makes you eligible, but Google decides what to show. Meeting the requirements (a name, plus offers, review or aggregateRating, and for merchant listings an image, price and currency) is the starting point.

    Shopify Schema Markup Is Mostly About Not Breaking What Already Works

    For most stores, the job is not to add schema but to check it: confirm that one clean Product block exists, fill any gaps and make sure no app is fighting the theme. Do that, keep your visible product data accurate, and your markup will keep telling Google the right story.

    Try Prodiify free on the Shopify App Store for clearer product content that your schema can reflect.

  • Shopify SEO for New Stores: A Realistic 30-Day Plan

    Shopify SEO for New Stores: A Realistic 30-Day Plan

    Shopify SEO for new stores is about building foundations in the first month, not winning rankings. Here is what to do, week by week, and what to expect.

    You launched your store. Your products are live, and you have checked your Google results every morning. Nothing. A few impressions, maybe, and almost no clicks.

    If that sounds familiar, take a breath: it is normal. SEO does not work like an ad. One seller listing on a freelance site puts it plainly: unlike other popular marketing channels, SEO does not work instantly.

    The first 30 days are for setting things up properly so that Google can find, understand and trust your store. This guide gives you a four-week plan for Shopify SEO for new stores, and an honest picture of what results to expect.

    What to Expect in the First 30 Days

    Before the plan, a reality check on timing:

    • Indexing takes days to weeks. One guide says it takes between four days to four weeks for a new site to be crawled and indexed by Google. Another says it can take anywhere from a few days to several weeks for Google to index new pages.
    • Ranking takes longer. Guides commonly say that ranking on the first page for competitive keywords takes months of consistent work, not weeks.
    • Early data looks thin. One Shopify Community poster described slow early traction, with 91 pages indexed in about two weeks out of roughly 3,200 total.

    So the goal of month one is not traffic. It is to get indexed, fix your core pages and start building a foundation you can improve every month.

    Your Week-by-Week Plan for Shopify SEO for New Stores

    Here is the plan. Each week has a clear theme and a short list of tasks.

    Week 1: Make Your Store Findable

    This week is about making sure Google can reach your store at all.

    1. Remove password protection. If your store is still behind a password page, search engines cannot see it. Make sure it is off before you expect anything to be indexed.
    2. Set up Google Search Console. Create a property for your store and verify your domain. If you skip this step, you will have no data on how Google sees your store.
    3. Submit your sitemap. Shopify generates one for you. As one guide explains, Shopify automatically generates a sitemap for your store, which can be accessed at yourstore.myshopify.com/sitemap.xml. In Search Console, open Sitemaps, enter the URL and submit it. Do the same in Bing Webmaster Tools.
    4. Inspect your key pages. A Shopify Community reply recommends to set up Search Console, submit sitemap.xml, then inspect 5 to 10 key product and collection URLs, and fix indexing or canonical issues first. Use the URL Inspection tool to request indexing for your homepage, top collections and best sellers.
    5. Check indexing. Search site:yourstore.com on Google. If results appear, your store is indexed. If not, give it some days after submitting.

    For a deeper technical review, use our Shopify technical SEO checklist.

    Week 2: Fix Your Core Pages

    Now improve the pages that matter most: your homepage, your main collections and your top ten products. Do not try to perfect everything. Pick the pages shoppers are most likely to land on.

    1. Write clear product titles. Say what the product is and who it is for. See our guide to Shopify product title SEO.
    2. Write a unique meta description for each. See the Shopify product meta description guide.
    3. Replace thin or copied descriptions. Supplier text is the same on every competitor’s site. Our guide to enhanced product descriptions on Shopify shows the format.
    4. Add alt text to images. See Shopify image alt text.
    5. Set up your collection pages properly. Names, URLs, intros and unique titles. See Shopify collection page SEO.
    6. Avoid duplicates from the start. If similar products share titles, fix them. See Shopify duplicate meta titles.

    If drafting is the slow part, Prodiify can help you move faster. The AI SEO app for Shopify stores helps you write and refine titles, descriptions and meta content one product at a time. Always review the result so it stays accurate. You can also draft with an AI product description generator for Shopify, a Shopify product description generator or these ChatGPT prompts for Shopify product descriptions.

    Week 3: Add Helpful Content

    Product pages alone rarely bring a new store its first visitors. Week three is about giving people (and Google) a reason to find you through useful content.

    1. Choose long-tail topics, not head terms. A new store will not outrank big brands for “leather wallets”. It has a better chance with specific searches such as “slim leather wallet for travel”. Think of the exact questions your customers ask.
    2. Publish two or three genuinely helpful posts. Buying guides, comparisons, care instructions or how-it-works pieces. Write them for a person, not a search engine.
    3. Link everything together. Link from your posts to relevant products and collections, and between related posts.
    4. Keep language natural. Do not stuff keywords. See keyword stuffing on Shopify.
    5. Get your structure right. If you sell colors and sizes, read Shopify product variants SEO. If you retire or rename products, read the Shopify 404 redirect guide.

    Week 4: Build Trust and Measure

    Search engines and shoppers both look for signs that a store is real and reliable.

    1. Complete the trust basics. About page, contact details, shipping and returns, privacy policy. Make them easy to find.
    2. Make the pages convince. See Shopify product page design. If you also sell on marketplaces, Shopify vs Amazon product pages shows where the gap tends to appear, and A+ Content for Shopify explains richer pages. To compare options, see the Amazon A+ Content alternative for Shopify guide.
    3. Earn a few genuine links and mentions. Claim your business profiles, list your store where it truly fits, and take part in communities by helping people, not by posting links. A handful of real, relevant mentions beats a hundred weak ones.
    4. Check your first data. Open Search Console and look at pages indexed, impressions, clicks and the queries you appear for.
    5. Plan month two. Use that data to decide which pages to improve next.

    What to Track Each Week

    WeekWhat to checkWhat good looks like
    1Sitemap submitted, key pages indexedNo errors, pages start appearing in site:
    2Core pages updatedTop ten products have unique titles and descriptions
    3Content publishedTwo or three helpful posts, linked to products
    4Impressions and queriesImpressions growing, even if clicks are low

    Early on, impressions are the number to watch. They mean Google is showing your pages. Clicks usually follow later, once your pages move higher in results.

    Mistakes New Stores Make

    • Expecting rankings in weeks. Plan for months.
    • Chasing big keywords. Start with specific, lower-competition searches.
    • Copying supplier descriptions. They make your pages look identical to others.
    • Stuffing keywords into titles and descriptions.
    • Skipping Search Console. You cannot improve what you cannot see.
    • Publishing and never revisiting. SEO rewards steady improvement.
    • Leaving the store password-protected by accident.

    Keep Going After Day 30

    The first month sets the foundation. After that, a simple monthly rhythm works well: review Search Console, improve your weakest pages, publish a new helpful post and fix any issues. For ongoing guidance, use our Shopify SEO checklist and these Shopify SEO tips.

    Shopping is also starting to happen inside AI assistants, and clear product information helps there too. See how to check if ChatGPT recommends your products, Shopify AI search optimization for ChatGPT, how to get your Shopify products in ChatGPT and Shopify agentic commerce. For richer product pages, Prodiify MediaXL adds drag-and-drop blocks (Banner/Hero, Image + Text, Feature List, Gallery, Video and Carousel) with no theme edits and no code.

    FAQs- Shopify SEO for new stores

    1.What is the first thing to do for Shopify SEO for new stores?

    Make sure your store is not password-protected, then set up Google Search Console and submit your sitemap. Shopify generates the sitemap automatically at /sitemap.xml.

    2.How long does it take for a new Shopify store to show up on Google?


    Indexing often takes a few days to several weeks. Appearing for a search is different from ranking well, and competitive keywords usually take months.

    3.do I have impressions but no clicks?

    It is common for new stores. Your pages are being shown, but usually deep in the results, where few people click. Keep improving content and targeting more specific searches, and clicks tend to follow as pages move higher.

    4.Should a new store start with a blog?

    A few genuinely helpful posts targeting specific questions can help, but only if they are useful. Focus on core product and collection pages first, then add content.

    5.Do I need a paid app for SEO?

    No. Shopify provides the basics, including a sitemap and fields for titles and descriptions. Apps can save time, but they are not required.

    Shopify SEO for New Stores Is a Marathon, So Build the Foundation First

    You will not win page one in 30 days, and no honest plan promises it. What you can do is set your store up to be found, make your core pages clear and unique, publish a few helpful pieces and start reading your data. Do that, and month two starts from a far stronger place.

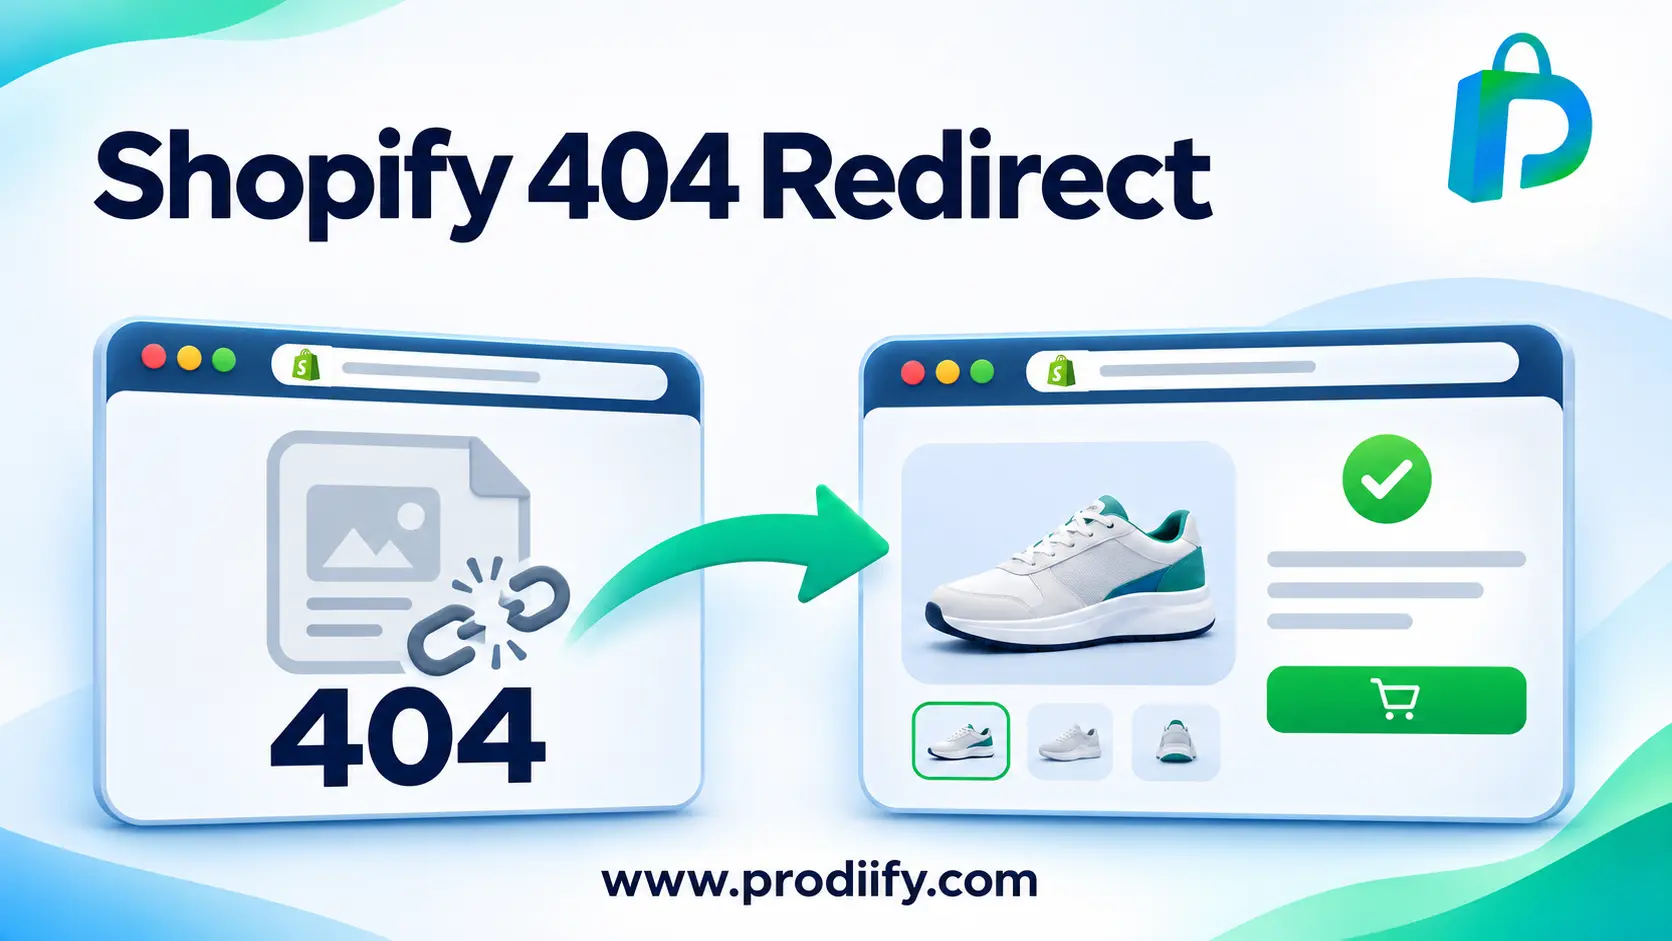
  • Shopify 404 Redirect: Causes, Fixes and When to Skip It

    Shopify 404 Redirect: Causes, Fixes and When to Skip It

    A Shopify 404 redirect sends visitors from a dead page to a live one. Used well, it protects both your shoppers and your search traffic.

    A shopper clicks a link to a product they saw on Instagram. The page says “404 Not Found”. They leave, and they are unlikely to come back.

    Broken pages are a normal part of running a store. Products get deleted, collections get renamed and links get mistyped. The goal is not to have zero 404 errors. It is to handle the important ones, and a Shopify 404 redirect is the main tool for that. This guide explains what causes 404s, how to find them, how to set up redirects and, just as important, when a redirect is the wrong answer.

    What a 404 Error Actually Is

    A 404 means the server could not find the page at that address. Shopify shows a “404 Not Found” page when a visitor requests a URL that does not exist in your store.

    One 404 is not a disaster. The trouble starts when an old, valuable URL, such as a product page with backlinks or a collection people bookmarked, returns a 404 and nothing leads shoppers to where the content went.

    Common Causes of 404 Errors on Shopify

    • Deleted products or collections. The page no longer exists, but old links, search results and bookmarks still point to it.
    • Changed URL handles. Renaming a product or collection can change its URL. A guide that cites the Shopify Help Center says changing a product or page handle generates a 301 automatically, while changing themes, variants or deleting products does not.
    • Restructured stores or migrations. Moving to Shopify or reorganizing collections changes many URLs at once.
    • Mistyped internal links. A wrong link in your menu, a blog post or a banner sends visitors to a page that does not exist.
    • Old backlinks. Other sites may link to URLs you have since changed.

    How to Find 404 Errors

    You cannot fix what you cannot see. Start with these sources:

    • Google Search Console. Check the pages report for URLs that return “Not found (404)”. A Shopify Community reply suggests exporting the list: download the 404 URLs from Google Search Console as CSV, then clean the file with the old URL and the new URL.
    • Google Analytics. Look for visits to your 404 page and see which URLs triggered it.
    • A site crawler. Free and paid crawlers scan your store for broken internal links.
    • Redirect and broken-link apps. Several apps track 404 hits and scan products, collections, pages and blogs for broken links. Prodiify does not do this, but the Shopify App Store has options.

    Sort what you find by importance. A 404 that gets one visit a year matters less than a deleted best seller that still gets traffic from Google.

    Setting Up a Shopify 404 Redirect

    Shopify has a built-in redirect tool, and for a handful of URLs it is all you need.

    1. From your Shopify admin, go to Online Store > Navigation.
    2. Click URL Redirects.
    3. Click Create URL redirect.
    4. In Redirect from, enter the old path, for example /products/old-product-name. One guide notes to use only the path, not the full URL.
    5. In Redirect to, enter the new page.
    6. Click Save redirect.

    A detail worth knowing: one guide points out that redirects only function when the original URL returns a 404 error; they cannot redirect active pages. If the old page still exists, the redirect will not trigger.

    Bulk Redirects With a CSV File

    If you have dozens or hundreds of URLs, such as after a migration, import them in one go.

    1. In URL Redirects, click Import.
    2. Download the sample CSV and follow its format, with two columns: Redirect from and Redirect to.
    3. Upload your file and confirm the import.

    A few practical warnings from guides on this: one notes that if you do not convert an Excel file to CSV and try to upload it, you will see an error. The same guide advises to double-check the file for spelling mistakes and make sure each “from” URL returns a 404 before importing, and to review any errors Shopify reports before uploading again.

    One more thing on limits: a third-party guide says standard stores can create up to 100,000 URL redirects, with a much higher limit on Shopify Plus. Check Shopify’s current documentation, since limits can change.

    When to Redirect, and When Not To

    This is the part most guides skip. A redirect is a promise: “the thing you wanted is over here.” A misleading redirect breaks that promise.

    SituationWhat usually makes sense
    Product temporarily out of stockDo not redirect or delete. Keep the page live, show it clearly as sold out and consider a back-in-stock option or links to similar items.
    Product permanently discontinued, with a close replacementRedirect to the closest equivalent product or its collection.
    Product discontinued, nothing similarRedirect to the most relevant collection. If nothing is truly relevant, many SEOs prefer a clean 404 over a misleading redirect.
    Handle or URL changedRedirect old to new. Shopify offers to create the redirect when you edit a handle, so keep that option ticked.
    Collection renamed or mergedRedirect the old collection to the new one.
    Store migrationMap old URLs to their closest new equivalents and import them by CSV.
    Mistyped link on your own siteFix the link itself instead of adding a redirect.

    Redirect Mistakes to Avoid

    • Sending everything to the homepage. It is easy, but if the destination does not match what the visitor wanted, it frustrates shoppers, and search engines may treat irrelevant redirects like missing pages.
    • Redirect chains. A to B to C slows pages down. Point the old URL straight to the final one.
    • Redirect loops. A to B and B back to A. Test every redirect after saving.
    • Redirecting a page that still has stock. Remember that a redirect only kicks in when the page returns a 404, but deleting a live product just to redirect it is rarely a good idea.
    • Forgetting internal links. If your menu or blog still points to the old URL, update the link instead of leaning on a redirect.
    • Never checking. Re-run your 404 report a few weeks after changes.

    Make Your 404 Page Useful

    Some 404s will always slip through, so make that page helpful. Most themes let you customize the 404 page through the theme editor. Useful additions are a search bar, links to your main collections and a short friendly message. A shopper who lands on a helpful dead end is far more likely to keep browsing than one who hits a blank page.

    Keep Your Pages Healthy Beyond Redirects

    Redirects are one part of a healthy store. If you are changing URLs, you may also need to review your page titles. See our guide to Shopify duplicate meta titles and Shopify product title SEO. If you are deciding how to structure colors and sizes, read Shopify product variants SEO, and for category pages see Shopify collection page SEO.

    For the wider picture, work through our Shopify technical SEO checklist, Shopify SEO checklist and these Shopify SEO tips. Clear product information also helps with AI shopping tools. See how to check if ChatGPT recommends your products, Shopify AI search optimization for ChatGPT, how to get your Shopify products in ChatGPT and Shopify agentic commerce.

    When a page does stay live, make it as strong as it can be. Our guides to enhanced product descriptions on Shopify, Shopify image alt text and Shopify product page design show how. To draft copy faster, try an AI product description generator for Shopify, a Shopify product description generator or these ChatGPT prompts for Shopify product descriptions. If you also sell on marketplaces, compare Shopify vs Amazon product pages, learn what A+ Content for Shopify means, or see the Amazon A+ Content alternative for Shopify guide.

    To be clear about scope: Prodiify does not manage redirects. Its AI SEO app for Shopify stores helps with the content side, writing and refining product titles, descriptions and meta content one product at a time, and Prodiify MediaXL adds drag-and-drop blocks to product pages with no code.

    A 30-Minute Cleanup

    1. Open Google Search Console and export your 404 URLs.
    2. Sort them by traffic or importance and pick the top ten.
    3. Decide for each: redirect, fix the link or leave it.
    4. Create the redirects in Online Store > Navigation > URL Redirects.
    5. Test each one, then re-check in a few weeks.

    FAQs About Shopify 404 redirect

    1.What is a Shopify 404 redirect?

    It is a rule that sends visitors from a URL that no longer exists to a working page. You create it in Online Store > Navigation > URL Redirects, either one at a time or by CSV import.

    2.Do 404 errors hurt SEO?

    A few 404s are normal and not a problem. The risk comes from important pages, such as ones with traffic or backlinks, returning 404 with no redirect, because visitors and ranking value are lost.

    3.Should I redirect out-of-stock products?

    Usually not. If a product will return, keep the page live and mark it clearly as sold out. Redirect only when a product is permanently gone, and send visitors to the closest relevant product or collection.

    4.Why is my redirect not working?

    Check that the old URL really returns a 404 (redirects do not trigger on live pages), that you entered the path correctly, and that there is no redirect loop or chain.

    5.Can I bulk redirect many URLs?

    Yes. Use the Import option in URL Redirects with a CSV that has two columns, Redirect from and Redirect to. Convert Excel files to CSV first.

    A Shopify 404 Redirect Is a Promise, So Make It a Relevant One

    You do not need to chase every broken link. Find the 404s that matter, redirect them to the closest relevant page and let the rest go. A thoughtful Shopify 404 redirect keeps shoppers moving and protects the search traffic you worked to earn.

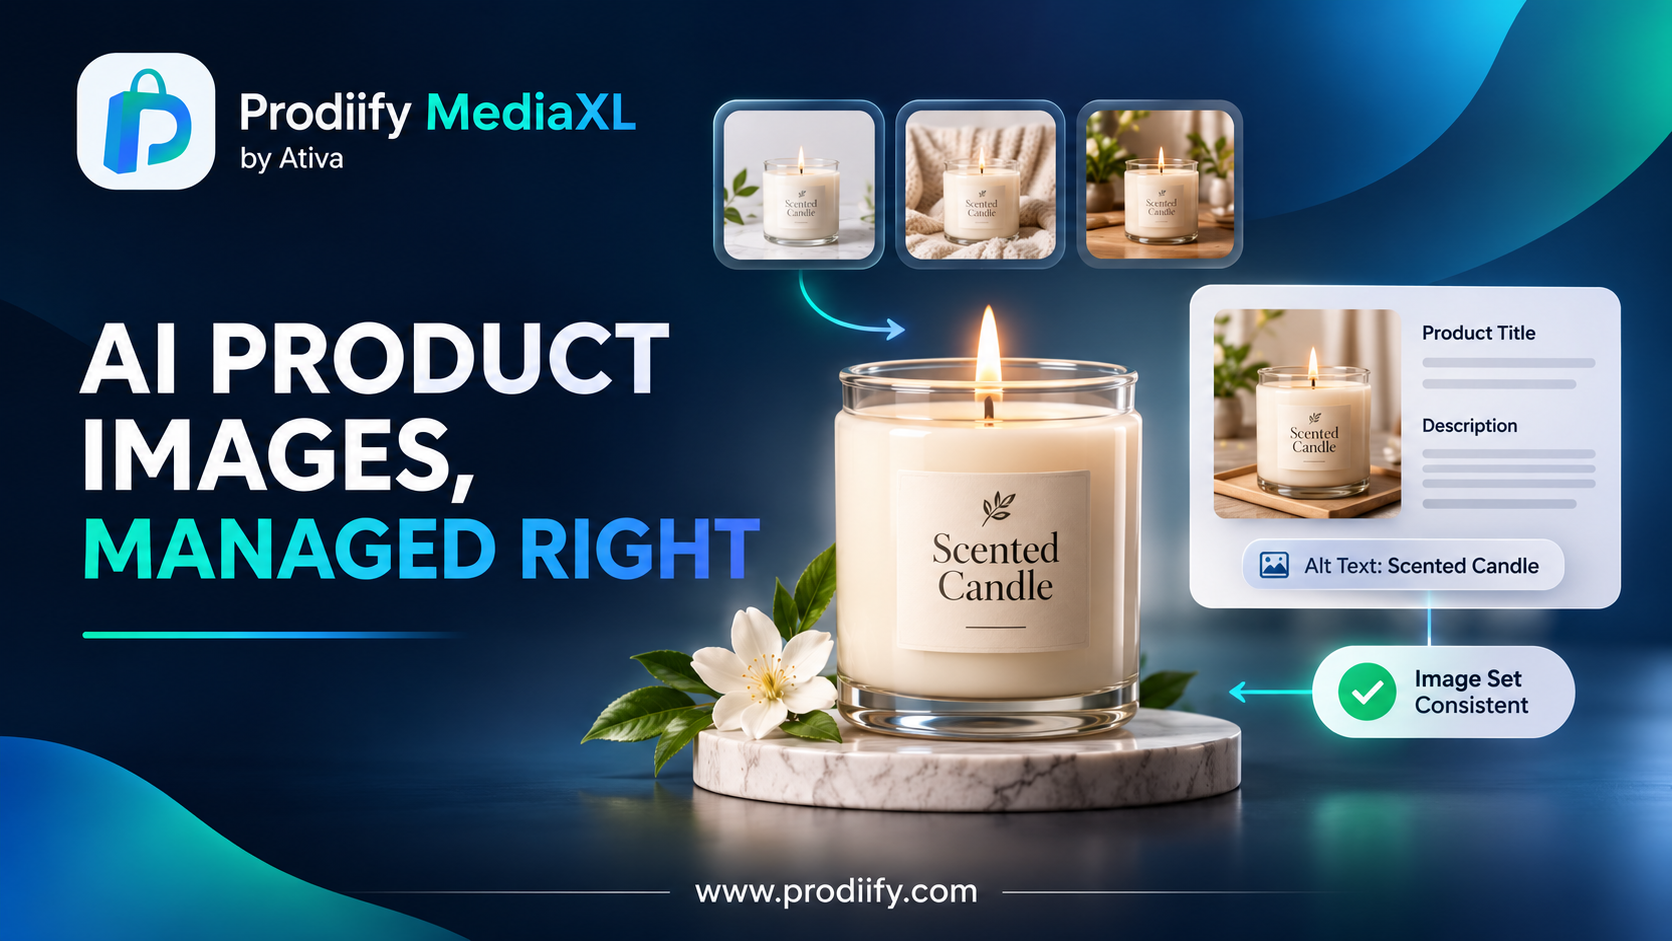
  • AI Product Image Generator: Why Great Product Images Are Really a Product Management Problem

    AI Product Image Generator: Why Great Product Images Are Really a Product Management Problem

    An AI product image generator can make weak photos look professional, but the stores that win treat images as part of their product data, not as decoration.

    Meet Maya. She sells hand-poured candles from a small studio, and she is good at it. Her scents are thoughtful, her packaging is lovely, and her customers write kind reviews.

    Her product photos, though, were taken on a kitchen counter, on different days, in different light. Six candles, six different looks. Nothing is wrong with any single photo, but together the store feels unfinished. (Maya is imaginary, but her situation is one many small sellers will recognize.)

    Then she tries an AI product image generator. A clean version of her best photo comes back in a minute. A second one shows the candle on a shelf next to a book. For the first time, the catalog looks like one brand.

    Here is the part that matters, and the reason this post exists: the tool did not fix Maya’s store. How she managed what came next did.

    The Photo Problem Nobody Budgets For

    Most sellers know images matter. Fewer plan for how much work a catalog of good ones takes: shooting, editing, naming, resizing, writing alt text, keeping every product consistent when new ones arrive.

    That is why AI image tools are so appealing. As one ecommerce publication describes it, a generator lets a seller upload a single reference photo and produce cleaner, listing-ready images without arranging a new shoot. For a small team, that can close a gap that used to need a studio.

    Start From the Truth

    There is one rule that separates sellers who benefit from these tools from sellers who regret them: begin with an honest picture of the real product.

    One workflow guide puts it plainly: the best approach starts with a truthful original image, makes only necessary edits, and checks every final file for accuracy, clarity and page performance.

    That is the rule Maya follows. Her candle is a creamy off-white, so the generated version must be creamy off-white, not a glossy studio white. The label must say what the real label says. The jar must be the size it really is. If a shopper opens the box and thinks “this is not what I saw”, no beautiful picture will save the sale, or the review.

    A seller-focused guide suggests a short review before publishing, comparing color, label, logo, edge quality, shadow, material, scale, crop, alt text, filename and page context. You do not need a ten-point ritual for every image, but it is a good habit to keep.

    Images Are Product Data

    This is the idea I would most like you to take away. We tend to file product images under “design”. But an image behaves much more like data: it has to be accurate, consistent, labeled and kept up to date, just like a title or a price.

    Think about everything attached to one picture. There is a file name, alt text for shoppers who cannot see it, the page it sits on, and the variant it represents. Our guide to Shopify image alt text goes into the alt text part, and it is worth the few minutes, because a generated image with no description is only half finished.

    An image also needs to agree with the words around it. If the title says “8 oz soy candle” and the picture shows a much larger jar, someone will notice. That is why clear titles and descriptions matter just as much as pictures. See Shopify product title SEO and enhanced product descriptions on Shopify for the written side.

    Be Honest About AI, Too

    Rules about AI-made images are still settling. One 2026 legal guide notes that platforms phrase their rules differently, with Amazon anchoring on accuracy, Etsy on explicit AI disclosure and Google Shopping on feed metadata, but all converging on the same two questions: does the buyer understand what they are looking at.

    On disclosure, one guide suggests it is best practice to disclose when AI generates the entire image, though it is not strictly required when AI fills the scene around a real product. It also notes that some jurisdictions are moving toward requiring it. Rules vary by country and platform, so check the policies of the places you sell, and when in doubt, be open about it. I am not a lawyer, and this is not legal advice.

    What to Generate First

    You do not need fifty images. Most stores do well with a clear hero image and a few supporting ones. As one tool’s guide puts it, there is no universal winner, and many stores benefit from a clear product hero image plus lifestyle images that show the product in use, though fashion often needs model shots and technical products often need detail photos. Test what works on your own traffic.

    For Maya, that meant three images per candle: a clean front view, a calm lifestyle scene and a close-up of the wax and wick. Same style across all six scents.

    Where Product Management Comes In

    This is where an AI product image generator stops being a clever trick and becomes part of how you run the store.

    Good product management is simply keeping everything about one product in order: the title, the description, the tags, the images, the alt text. When those live in one place and get updated together, you avoid the usual mess of mismatched photos, outdated descriptions and missing details.

    That is the idea behind Prodiify. The AI SEO app for Shopify stores lets you work product by product, helping you write and refine titles, descriptions and meta content, and create AI images, so each product’s content is handled together rather than scattered across tools. As always with AI, review the result before it goes live. For the page layout itself, Prodiify MediaXL adds drag-and-drop blocks (Banner/Hero, Image + Text, Feature List, Gallery, Video and Carousel) to product pages, with no theme edits and no code.

    If you are curious how richer pages compare to marketplace listings, we explored that in Shopify vs Amazon product pages, and the idea behind them in A+ Content for Shopify. For a broader look at making a page persuasive, see Shopify product page design.

    Images Help Search and AI Shopping, Too

    Clear, accurate images and descriptions help people, and they also help the tools that increasingly recommend products. If you want to see whether that is working for you, try our free test in how to check if ChatGPT recommends your products. To go deeper, read Shopify AI search optimization for ChatGPT, how to get your Shopify products in ChatGPT and Shopify agentic commerce.

    For the foundations, our Shopify SEO checklist, these Shopify SEO tips and the Shopify technical SEO checklist cover the basics. If you are tempted to stuff keywords into descriptions or alt text, read keyword stuffing on Shopify first. And for drafting copy faster, try an AI product description generator for Shopify, a Shopify product description generator or these ChatGPT prompts for Shopify product descriptions.

    A Small Experiment for This Week

    Pick one product. Take your best real photo. Create one clean version and one lifestyle version, and compare them to the real product honestly. Write alt text for each. Publish, and leave a similar product unchanged for comparison.

    Give it a few weeks, then look at the numbers. One test on one product tells you more than any list of tips.

    FAQs- AI Product Image Generator

    1.Can an AI product image generator replace a photoshoot?

    For some products and stages, it can cover a lot of ground, but it works best starting from real photos of the real product. Many sellers use it to supplement photography, not to replace it entirely.

    2.Do I have to say an image is AI-generated?

    It depends on the platform and where you sell. Some guidance suggests disclosure is best practice when AI creates the whole image, and some jurisdictions are moving toward requiring it. Check the rules for each place you sell, and when unsure, be transparent.

    3.What size should product images be?

    One tool guide notes that Shopify generally recommends high-resolution square photos, often 2048 x 2048 pixels, compressed for speed. Check Shopify’s current guidance for your theme.

    4.How do I keep images consistent across a catalog?

    Choose a style (background, lighting, angle) and apply it to every product, then review each image against the real item before publishing.

    An AI Product Image Generator Works Best When You Manage Your Products Well

    Maya’s store did not improve because an AI tool made pretty pictures. It improved because she started from the truth, kept every image consistent with its title and description, and treated visuals as part of the product, not an afterthought. That is the part no tool can do for you, and the part that makes the tool worth using.

  • How to Use Tags to Organize and Rank Shopify Products

    How to Use Tags to Organize and Rank Shopify Products

    Shopify Product Tags SEO: How to Use Tags to Organize and Rank Products

    Shopify product tags SEO works indirectly, because tags are not a ranking factor on their own. Shopify’s own guidelines say search engines don’t use tags, so adding keywords to tags won’t push your products up Google. But tags still matter for SEO in an indirect way. They power automated collections, storefront filters and internal navigation, and those are the things that shape your site structure, your category pages and how easily shoppers (and search engines) find products. Used badly, the same tags can also create piles of thin, duplicate URLs.

    This guide shows you how to use tags the right way: to organize your catalog, build automated (smart) collection pages that can actually rank, strengthen your site structure and internal links, and avoid the common tag problems that quietly hurt SEO.

    What are Shopify product tags SEO?

    Product tags are short labels you attach to a product. Shoppers usually never see them as plain text, but they work behind the scenes to group, filter and automate. Typical tags describe color, size, material, gender, season or product style.

    Tags are often confused with other organizing tools in Shopify. Here is how they differ:

    ToolPurposeHow many per productCustomer-facing page?
    TagsFlexible labels for filtering, automation and internal organizationMany (up to 250)Only if used in a filter or collection condition
    Product typeOne broad category labelOneNo
    CollectionsCurated groups of productsA product can be in manyYes, with its own URL, title and meta description
    MetafieldsStructured product data (specs, materials, dimensions)ManyNo, unless your theme shows them

    The key takeaway: tags are the engine, and collections are the pages that face customers and Google.

    Shopify product tags SEO: do tags actually help rankings?

    The honest answer has two parts.

    Directly: no. Shopify’s documentation states that search engines don’t use tags, so stuffing tags with keywords is wasted effort.

    Indirectly: yes, in three ways.

    1. Automated collections. A collection with the condition “Product tag is equal to maxi-dress” fills itself automatically. Each collection has its own URL, title, description and meta tags, which is exactly the kind of page that can rank for category searches.
    2. Better navigation and internal linking. When products are tagged consistently, shoppers can filter quickly and reach the right product in fewer clicks. Better usability supports engagement, and a clean structure helps search engines understand how your catalog fits together.
    3. Cleaner catalog management. A disciplined tag system makes it easier to find gaps, spot duplicate products and keep collections up to date as your range changes.

    The flip side is real too. When tags are used as storefront filters, Shopify can generate tag-based URLs that follow a pattern like /collections/collection-name/tag-name. These pages show nearly the same products as the parent collection and usually have no unique content. If you have hundreds of tags, you can end up with hundreds of low-value URLs, which can mean duplicate or thin content, wasted crawl budget and pages competing with your main collection for the same keywords.

    So the goal is not “more tags.” The goal is a small, consistent set of tags that feed useful collections.

    How to build a tagging system that helps SEO

    Step 1: Decide what each tag is for

    Before adding a single tag, decide its job. Most tags fall into one of two groups:

    • Shopper-facing attributes: color, size, material, style, gender, occasion. These power filters and collections.
    • Internal tags: supplier, season, campaign, “needs photos,” “reviewed.” These help your team and your automations, and should never become public pages.

    Writing this down in a simple tag guide saves you from messy cleanup later, especially when several people add products.

    Step 2: Use one naming format and stick to it

    Shopify recommends using ordinary letters, numbers and hyphens in tags, and avoiding accented characters and special symbols. Special characters can behave unexpectedly in search and in automated collection conditions.

    A simple convention that works for most stores:

    • Lowercase everything: maxi-dress, not Maxi Dress
    • Use hyphens between words: organic-cotton
    • Singular or plural, pick one and keep it
    • No abbreviations or internal codes shoppers wouldn’t recognize

    Inconsistent versions like “Black,” “black” and “blk” clutter your tag list and can produce duplicate filter options and collections.

    Shopify Product Tags SEO
    Shopify Product Tags SEO

    Step 3: Be specific, not generic

    Tags like “new,” “sale” and “featured” are tempting but weak. They change constantly, they don’t describe the product, and any page they generate lacks a clear theme. If you need them for promotions, treat them as internal tags and keep them out of your public filters.

    Specific tags describe what the product is and how shoppers search for it: maxi-dress, wedding-guest, linen, plus-size.

    Step 4: Keep the count low

    Shopify allows up to 250 tags per product, but that is a ceiling, not a target. Every extra tag adds one more possible filter combination. For most stores, a handful of well-chosen tags per product (roughly 5 to 15 is a sensible range) covers everything shoppers and your team need. If you find yourself reaching for 30 tags, your product probably needs better attributes, metafields or collections instead.

    Step 5: Turn tags into automated collections

    This is where tags earn their SEO value. To create a tag-based collection in Shopify:

    1. In your Shopify admin, go to Products → Collections and click Create collection.
    2. Enter a clear collection title, such as “Maxi Dresses.”
    3. Under Collection type, choose Automated.
    4. Add a condition: Product tag is equal to maxi-dress.
    5. Save the collection. Every product with that tag now appears automatically, and new products join as soon as they’re tagged.

    Then do the part most stores skip: write a unique collection description, set a proper SEO title and meta description, and link to the collection from your navigation menu, homepage and related blog posts using descriptive anchor text. A collection with real content and a clear title is far more likely to rank than a bare filter page.

    Step 6: Promote high-demand tags into real collection pages

    If people search for a phrase like “organic cotton t-shirts” or “maxi dresses,” that phrase should be a collection page, not just a tag filter. Check Google Search Console or your keyword tool, find the tags that match real search demand, and build dedicated collections for them with unique content.

    Step 7: Audit and clean up regularly

    Over time, stores collect unused, duplicate and outdated tags. Once or twice a year:

    • Export your products and review every unique tag
    • Merge near-duplicates (black, Black, blk)
    • Remove tags that no collection, filter or automation uses
    • Delete outdated seasonal and campaign tags, or add the year so they’re easy to refresh

    If an old tag URL was already indexed and you remove the tag, set up a redirect to the most relevant collection so you don’t leave dead ends.

    How to fix tag-related SEO problems

    If your store already has lots of tag pages in Google’s index, these are the main fixes.

    1. Noindex low-value tag pages. A “noindex, follow” directive tells search engines not to index the page while still following its links. Many Shopify themes support this with a small snippet in the theme.liquid file, inside the head section:

    {% if current_tags %}
      <meta name="robots" content="noindex, follow">
    {% endif %}

    Always duplicate your theme before editing code, and test on a few URLs afterward.

    2. Be careful with robots.txt. Blocking crawl paths can save crawl budget, but blocking a URL that is already indexed can leave it stuck in the index because Google can’t see the noindex tag. Use noindex first, and only block crawling once those pages have dropped out.

    3. Replace valuable tag pages with real collections. If a tag page targets a phrase people search for, turn it into a collection with unique content instead of noindexing it.

    4. Delete tags you don’t need. The simplest fix is often just fewer tags.

    Example: before and after

    Take a black linen maxi dress.

    Before (messy): Black, blk, NEW, sale, dress, maxidress, supplier-4421, Summer!!

    After (clean): dress, maxi-dress, black, linen, summer-2026, wedding-guest

    The cleaned-up set uses one format, describes the product accurately, drops codes and promo labels, and maps directly to automated collections like “Maxi Dresses,” “Linen Dresses” and “Wedding Guest Dresses.” The supplier code and promo labels can live in an internal tag system instead.

    Speed up tagging with AI

    Writing consistent tags for hundreds of products by hand is slow, and it’s where most naming mistakes creep in. Prodiify’s AI generates product tags along with titles, descriptions, meta titles, meta descriptions and image alt text, so your tags are based on what each product actually is. Review the suggestions against your naming convention (lowercase, hyphenated, specific), keep the ones that match your collections, and remove the rest.

    You can try it on the free plan, which includes 20 AI text credits per month.

    Shopify tags SEO checklist

    • Tags have a clear purpose: shopper-facing or internal
    • One naming format: lowercase, hyphens, no special characters
    • Specific tags, not generic ones like “new” or “featured”
    • A small number of tags per product
    • Automated collections built from your key tags
    • Each collection has a unique title, description and meta tags
    • High-demand tags promoted to dedicated collection pages
    • Low-value tag URLs set to noindex
    • Tags audited and cleaned at least once or twice a year

    FAQs- About shopify product tags SEO

    1.Do Shopify tags help SEO?

    Not directly. Search engines don’t use tags as a ranking signal. Tags help indirectly by powering collections, filters and clean site structure.

    2.How many tags should a product have?

    Shopify allows up to 250, but most products need only a handful. Fewer, well-chosen tags are easier to manage and create fewer extra URLs.

    3.Can customers see my product tags?

    It depends on your theme. Some themes show tags in filter menus or on product pages, so write them in a way that makes sense to shoppers.

    4.Should I use tags or collections?

    Both. Use tags to label products, and collections to create the pages shoppers and search engines visit. A tag-powered automated collection with unique content is usually the best combination.

    5.Are tags or metafields better?

    Tags are best for simple labels and automation. Metafields are better for structured data like dimensions or specifications. Many stores use both.

    6.What is the best tag format for Shopify?

    Use lowercase words separated by hyphens, such as maxi-dress or organic-cotton. Avoid accented characters and special symbols, and keep one spelling for each tag across your whole catalog.

    7.Do Google and other search engines index tag pages?

    They can. When tags are used as storefront filters, Shopify may create tag-based URLs that search engines crawl. Set low-value tag pages to noindex and send ranking power to dedicated collection pages instead.

    Final thoughts

    Shopify product tags SEO comes down to organization. Tags won’t rank your products by themselves, but they decide how well your catalog is organized and how good your collection pages can be. Keep them consistent, specific and few, turn the important ones into collections with real content, and clean them up regularly. Do that and your tags stop being clutter and start working for your SEO.

  • Shopify Product Variants SEO- One Product or Many?

    Shopify Product Variants SEO- One Product or Many?

    Shopify product variants SEO comes down to one question: does each color or size deserve its own page, or does it belong on one strong one?


    Picture a t-shirt that comes in 40 colors. Do you create one product with 40 variants, or 40 separate products? One SEO guide puts it simply: the answer changes your entire SEO footprint on Google.

    Merchants argue about this constantly, and both choices can go wrong. Stores with thousands of separate near-identical products suffer from thin content, while stores that cram genuinely different items into variants miss searches they could win. This guide gives you a clear way to decide, a quick check of your own store and a plan for fixing what you have. Getting Shopify product variants SEO right starts with understanding how Shopify treats them.

    Product, Option and Variant: The Basics

    Shopify uses three terms:

    • Product– the parent page shoppers land on (the T-shirt)
    • Option– a choice such as Color or Size
    • Variant– one specific combination (Black, Medium)

    As one guide describes it, “T-Shirt” is the product, “Color” and “Size” are options, and “Black, Medium” is the variant. In the standard model, one product can have up to 100 variants, with each variant a combination of up to 3 options. Shopify has reportedly raised that ceiling in recent updates, so check Shopify’s current documentation for your plan.

    How Variants Show Up in Search

    When a shopper picks “Red, Size 10”, Shopify can add a ?variant= parameter to the URL. What Google does with those URLs depends on the canonical tag, and here sources disagree:

    • One decision guide says Shopify sets a rel=”canonical” tag on every variant URL that points back to the parent product, so Google consolidates them into one indexed page.
    • An agency guide claims the opposite: that by default Shopify canonicalizes each variant URL to itself, not to the base product URL.

    Themes and versions can differ, so do not take either on faith. Check your own store, which takes two minutes:

    1. Open a product page and pick a non-default variant, so the URL shows ?variant=....
    2. Right-click the page and choose View page source.
    3. Search the source for canonical.
    4. Look at the href. Does it show the clean product URL (/products/your-product) or the variant URL?

    If it shows the variant URL, ask a developer to point it to the base product, since the same agency guide recommends that fix. Back up your theme before any code edit.

    Variants or Separate Products- The Trade-Off

    One product with variantsSeparate products
    PagesOne strong pageOne page per product
    Ranking focusConcentrates links, reviews and authorityCan target distinct searches
    Content riskLowThin or near-duplicate content if descriptions are copied
    Shopper experienceEasy comparison on one pageEasier discovery of distinct items
    AnalyticsTraffic rolls into one productPer-URL data for each product
    LimitsVariant caps applyNo variant limit per product

    An agency guide summarizes the strategy: one URL concentrates attention, while separate products can target more specific search intent.

    When Variants Are the Right Choice

    Keep products together when the differences are cosmetic or operational. One guide recommends variants when the differences are mostly cosmetic or operational, such as color, size or minor material changes. Good signs:

    • It is fundamentally the same item- The options are just choices.
    • Reviews should stay together– A decision guide lists products where reviews consolidate on one listing and social proof drives conversion as a good fit.
    • No separate search demand– The same guide notes that a “32oz water bottle” vs a “24oz water bottle” rarely has separate search volume.

    When Separate Products Make Sense

    Split when a variant has its own audience or its own story. The same guide recommends separate indexable URLs only for variants with distinct search demand or unique content. Good signs:

    • Shoppers search for it by name. “Navy trail running shoe” may have real demand.
    • You can write genuinely different content. Different description, images and use case.
    • You have outgrown the variant limit.
    • You want per-URL performance data.

    A guide on separate products explains the benefit: each separate product is a new ranking opportunity with its own on-page SEO signals.

    And the risk: splitting 200 products into 4,000 separate color variants, each with nearly identical descriptions, is a thin content signal.

    A Real-World Example

    A question from the Moz forum captures the dilemma: a store with 10 hat models, each in 5 colors. Option A is 50 separate products, one per color. Option B is 10 products with 5 color variants each.

    • Option B is more organized and avoids duplicate content, but it can lose color-specific searches. As the poster worried, a customer looking at a “red hats” collection may only see the default variant.
    • Option A captures color searches, but creates 50 near-identical pages unless each one gets its own images, copy and title.

    A sensible middle path for most stores: keep everything as variants, then split out only the colors or models people actually search for, and give each its own title, description and images.

    What About Combined Listings?

    Shopify’s Combined Listings feature tries to give you both. One guide explains that child products appear as separate cards on collection pages with their own images, URLs and SEO metadata. That means unique titles per color while shoppers still see the group together. Availability and setup may depend on your plan, so check Shopify’s documentation before relying on it.

    Your Action Plan for Shopify Product Variants SEO

    A clear Shopify product variants SEO plan fits into an afternoon for your top products.

    1. Check your canonical tags on a variant URL, using the two-minute test above.
    2. List your best sellers and note how their variants are set up.
    3. Sort each product: is it one item with options, or genuinely different items?
    4. Find real search demand. Check whether people search for specific colors or models before splitting anything.
    5. Name your options clearly. “Navy / Large” is better than “Option 1”.
    6. Add variant images with distinct alt text, such as “Navy leather wallet, open to show card slots”. See our guide to Shopify image alt text.
    7. Write unique content for any split-out product. Never copy the same description across near-identical pages.
    8. Review in a few weeks using Search Console and compare results.

    Common Mistakes

    • Making a separate product for every color by default
    • Copying the same description across split-out products
    • Cramming genuinely different items into one product as variants
    • Vague option names that confuse shoppers and search engines
    • Using one image for every variant
    • Never checking what your canonical tags actually do
    • Keyword stuffing in variant names. See our guide on keyword stuffing on Shopify.

    If you also see repeated titles after splitting, read our guide to Shopify duplicate meta titles.

    Variants Work Best With Clear Content

    Whichever model you choose, each page needs clear, specific content.

    Get Help Writing Distinct Content, Product by Product

    If you do split products, each one needs its own clear title and description so it does not look like a copy. Prodiify helps here. The AI SEO app for Shopify stores helps you write and refine titles, descriptions and meta content one product at a time, so each page starts from a draft rather than a blank box. Always review the result so it stays accurate. For the visual side of your product pages, Prodiify MediaXL adds drag-and-drop blocks (Banner/Hero, Image + Text, Feature List, Gallery, Video and Carousel), with no theme edits and no code.

    FAQs- About Shopify product variants SEO

    1.What is Shopify product variants SEO?

    It is the practice of setting up colors, sizes and other options so search engines and shoppers understand them: choosing between variants and separate products, checking canonical tags, naming options clearly and adding distinct images and content where it matters.

    2.Should I make each color a separate product?

    Not by default. Keep colors as variants when the product is fundamentally the same and there is no separate search demand. Split a color out only if people search for it specifically and you can write genuinely different content.

    3.Does Shopify create duplicate content from variants?

    Variant URLs with a ?variant= parameter can look like duplicates unless the canonical tag points to the main product URL. Sources disagree on Shopify’s default behavior, so check your own store by viewing the page source on a variant URL.

    4.How many variants can a Shopify product have?

    The standard limit has been 100 variants with up to three options, although Shopify has reportedly raised it in recent updates. Check Shopify’s current documentation for your plan.

    5.What are Combined Listings?

    A Shopify feature that lets you keep separate products, each with its own URL and metadata, while presenting them together. Availability may depend on your plan.

    Shopify Product Variants SEO Is About Matching Pages to Real Demand

    You do not need to restructure your whole catalog. Check your canonical tags first, keep simple options as variants, and split out only the products that shoppers search for by name and that you can describe in a genuinely different way. One strong page almost always beats ten weak ones.